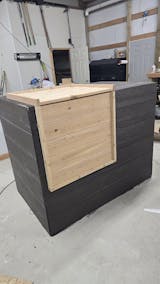
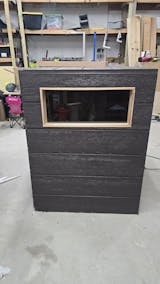
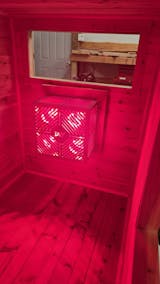
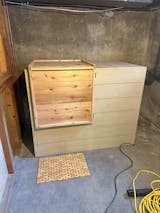
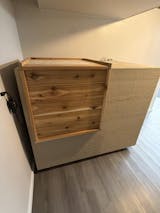
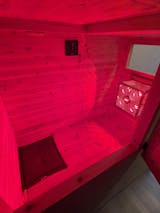
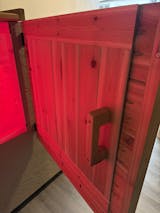
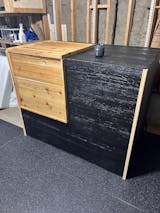
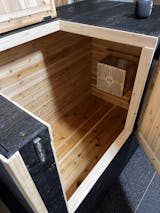
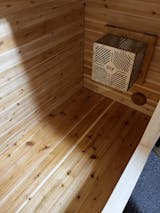
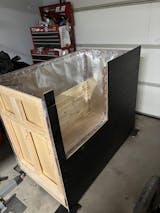
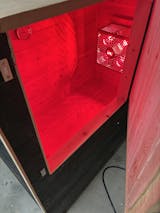
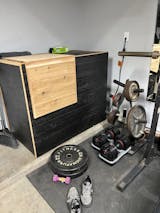
Check out Casey's bathtub DIY Cold Plunge conversion! He was one of the first to jump into the plan when it launched, and I'm so glad that he enjoyed the process of building a cold plunge for his home. Hearing how people have gained new skills, confidence and troubleshooting abilities during these projects is extremely fulfilling - thank you for sharing Casey!
Read on to hear some first-hand insight into the process and check out this legit DIY build!
Why did you build a DIY Cold Plunge?
My wife and I are both very active people. Along with being active are the aches and pains of getting older too. I started looking into cold plunge therapy after my coworker brought it up a while ago. The more I researched, the more it kind of made sense in my mind. From a young age, we take ice baths after sports for recovery, polar plunges as fundraisers that make you feel amazingly energetic when you're done and the mental challenge of doing something that is just hard. I started to finish my showers in the morning with a switch to cold water and decided that I could get behind having my own cold plunge. Looking at the options that were out there and honestly was kind of turned off by the fact that people were charging ridiculous amounts for the same tubs and chillers that they just threw a different logo on and then offered no customer service. Knowing that this was going into my basement meant I wanted something that looked good as well as fit downstairs so for me, a stock tank wasn't going to work. I've always been a DIY'er that enjoys a good puzzle and project so figured why not give it a go.
How did you hear about the plans?
After looking at about every video on YouTube that I could find on different cold plunges, I stumbled on Joe's DIY Cold Plunge page. This was right after he released his video for the bathtub conversion. The look of the tub immediately caught my eye and then when he did the "it can heat up to 107 degrees" I was sold.
How long did it take, from start to finish?
I think my tub took me about a week to finish working on it casually in the evening. The longest/hardest part was sourcing a tub for the build. I could've probably finished it faster, but I wasn't in a super rush and wanted to give my silicone and glues plenty of time to cure so I stuck to one step per night. I did have to go back after my initial leak test to reseal my main drain a little so that delayed it a bit. I also held off on buying some various parts and pieces, why I don't know, but it ended up with some extra trips to the store to buy them. Live and learn.
Did the cost of a DIY Cold Plunge match your expectations?
My overall budget was around $2500 after everything was said and done. I had some extra things I purchased like a warranty on my chiller, I went with the heated option as well. The tub and the chiller were the two most expensive components of the build. Joe laid out that the whole setup would run between $2500-3000 and I found that to be pretty accurate. The biggest tip that I can recommend is to just buy everything the first time and then return later what you don't need versus having to make multiple trips to the store. Shop around between the big box stores and online vendors. There are some decent price differences for some products between the different stores so a little online comparison can lead to a few hundred in savings. Also, I highly recommend just purchasing online and picking it up in-store. I probably saved myself 2 hours of scavenging the PVC aisle trying to find the right fitting.
What was the hardest part of the build?
The biggest difficulties that I had during the process were mostly self-induced. DRY FIT EVERYTHING before you start to glue. I made my entire filter assembly and then realized I never attached my filter bracket so I had to panic take apart everything before the glues set up. I also had the company I ordered the heater from send me the wrong model so I had to get that swapped out. Not having all the needed parts at local vendors was frustrating but not a show-stopper by any means. I ended up needing a longer tube for the light but that was only a small delay. Pretty much any problem can be overcome with ingenuity and a PVC union.
What did you think of the DIY Cold Plunge Bathtub Conversion Plans?
The plans were great for someone who had never done a project like this. A lot of the parts and pieces were things that I didn't have any prior experience with. I probably read through and watched the videos a dozen times each before my tub even got here. There were some parts where I thought I could maybe do something better or different, but usually just came back to Joe's plans (see chiller PVC conversion). Any questions I had, Joe did his best to reply back in a timely manner, even over the holidays.
Did you make any substitutions or modifications to the plan?
I chose to spray foam instead of pour-in, mainly just because Home Depot had some on a really good sale that I couldn't pass up. For the most part, I bought all the parts that were on the list but swapped up some vendors for cost savings reasons. I bought the spa fittings, ozone generator, Multicolor LED light and pump through the DIY website just for convenience. I'm going to add a small drip tray underneath just for my peace of mind since my tub is indoors in my basement. I bought my chiller with a 3-year extended warranty for the same reason.
What’s the best part of having a DIY Cold Plunge?
My favorite part about having a cold plunge at home and in my basement is the convenience of having it whenever I want. I don't have to worry about the weather outside, I can just head downstairs and get it knocked out. The added bonus of turning it into a hot tub was just the icing on the cake. Doing a plunge where I can 100% control the temperature is a huge perk.
Would you recommend the plans to other DIY'ers?
I would totally recommend the plans to anyone wanting to build a DIY tub. I went into this whole project with little to no experience and was able to make a tub that looks like it costs twice what I spent on it and will last me for years. Building my own tub gave me a very in-depth knowledge of every part, piece, fitting, and connection that went into it, every point of failure that existed as well as the knowledge and confidence to be able to fix it myself.


