Totally worth it! It was cheaper than the replacement pump Plunge wanted to sell me, and with the installation video, the process was pretty straightforward. I knew absolutely nothing about cold plunges and panicked when my pump died, but this kit made the replacement much easier than I expected.
The Danner 1200 feels like a quality piece of equipment. After doing some research, I found out Danner has been around for nearly 90 years, which gave me a lot more confidence in the product. The pump is solid, well-built, and noticeably heavier than the alternatives I looked at.
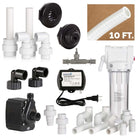
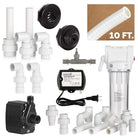
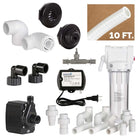
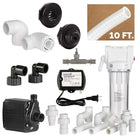
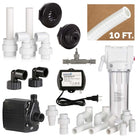
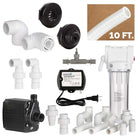
If your Gen 1 Plunge pump dies, I’d definitely recommend this kit. It includes just about everything you need and takes a lot of the guesswork out of the repair. So far, I’m very happy with it.